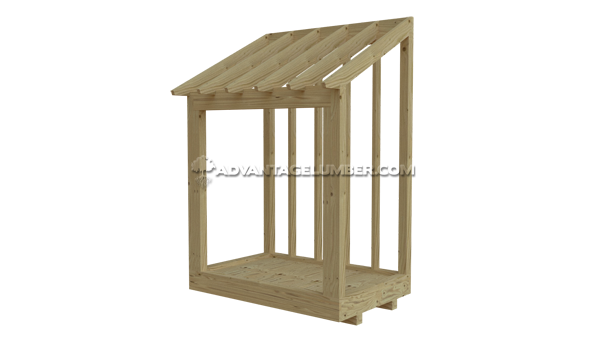
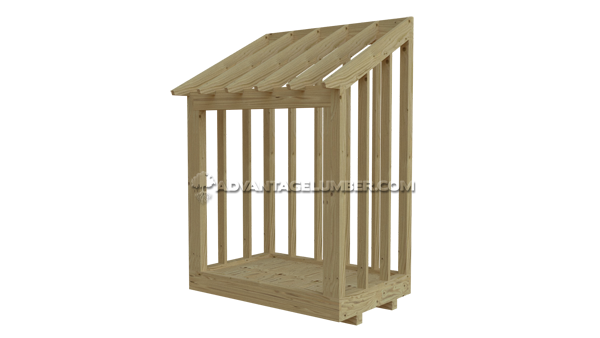
Lean-To Tool Shed
Keep Your Tools Safe & Dry in Style
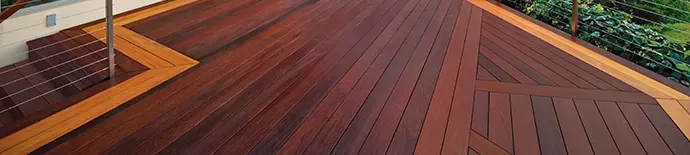
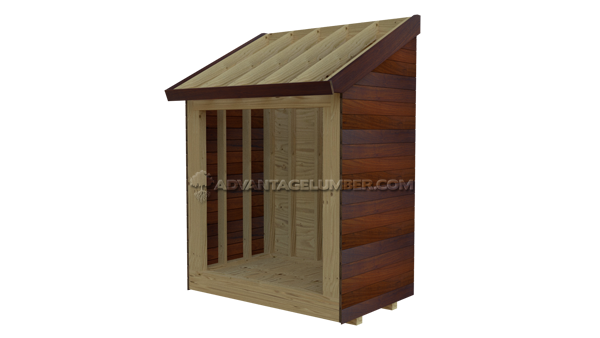
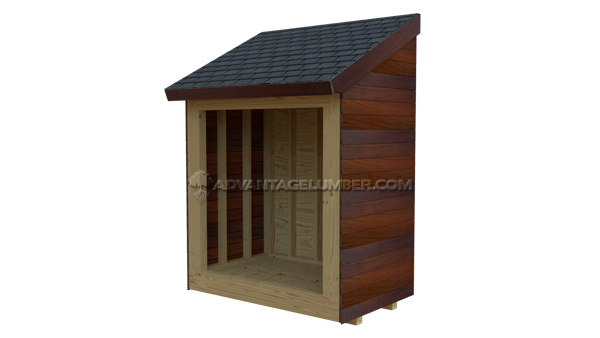
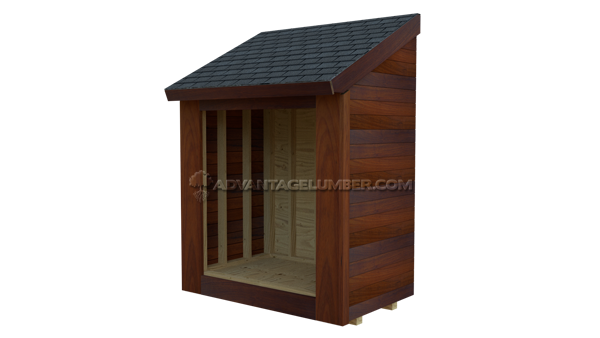
Tool bins are a must for any handyman or DIY fiend. After all, you need a place to store your handy tools when you’re done creating a master piece. This lean-to tool bin is not only ideal for storing larger tools; it will add a gorgeous architectural element to your backyard. This guide will show you how to build one using Advantage Ipe and Garapa. The end product is astoundingly beautiful and the durability, remarkable.
Materials List
- Compacted gravel
- Lumber
- Level
- 4x4 skids
- 2x6 rim joists
- Joist clip angles
- ¼" plywood
- Pencil
- Hammer
- Plumb bob
- Building paper
- Asphalt shingles
- Shims
- 10d casing nails
- Construction adhesive
- 1 ¼" screws
- Door hinges
- Fiberglass insect mesh
Cutting List
| Description | Quantity/Size | Material |
|---|---|---|
| Foundation | ||
| Drainage material | 0.5 cu. yd. | Compactable gravel |
| Skids | 2 @ 6' | 4x4 treated lumber |
| Floor Framing | ||
| Rim joists | 2 @ 6' | 2x6 treated lumber |
| Joists | 3 @ 8' | 2x6 treated lumber |
| Floor sheathing | 1 sheet @ 4x8 | ¾ tongue & groove ext.-grade plywood |
| Joist clip angles | 4 | 3x3x3"x16-gauge galvanized |
| Wall Framing | ||
| Bottom plates | 1 @ 8’, 2 @ 6’ | 2x4 treated lumber |
| Top plates | 1 @ 8’, 3 @ 6’ | 2x4 treated lumber |
| Studs | 14 @ 8’, 8 @ 6’ | 2x4 treated lumber |
| Header* | 2 @ 6’ | 2x6 treated lumber |
| Header spacer | 1 @ 6’ | 2x6 treated lumber |
| Roof Framing | ||
| Rafters* | 6 @ 6’ | 2x6 treated lumber |
| Ledger* | 1 @ 6’ | 2x6 treated lumber |
| Roofing | ||
| Roof sheathing | 2 sheets @ 4x8' | ½" ext.-grade plywood |
| Shingles | 30 sq. ft. | 250 # per square min. |
| Roofing starter strip | 7 linear feet | |
| 15# building paper | 30 sq. ft. | |
| Metal drip edge | 24 linear feet | Galvanized metal |
| Roofing cement | 1 tube | |
| Exterior Finishes | ||
| Hardwood siding | 21 @ 4' | 1x6 Ipe |
| Plywood siding | 1 sheet @ 4x8' | 5/8" Texture 1-11 plywood siding, grooves 8" O.C. |
| Corner trim | 6 @ 8' | 1x4 S4S Ipe |
| Fascia | 3 @ 6", 1 @ 6' | 1x8 S4S Ipe, 1x4 S$S Ipe |
| Bug screen | 8"x6' | Fiberglass |
| Doors | ||
| Frame | 3 @ 6' | ¾"x3½" (actual) Ipe |
| Stops | 3 @ 6' | 1x2 S4S Ipe |
| Panel material | 12 @ 6' | 1x6 T&G v-joint S4S Ipe |
| Z-braces | 2 @ 10' | 1x6 S4S Ipe |
| Strap hinges | 6, with screws | |
Step 1
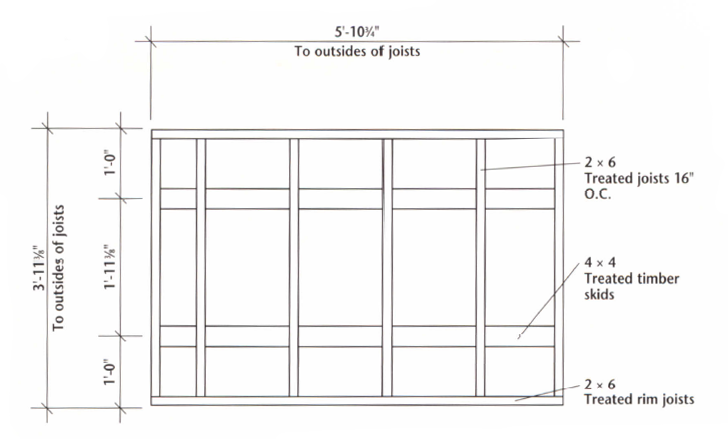
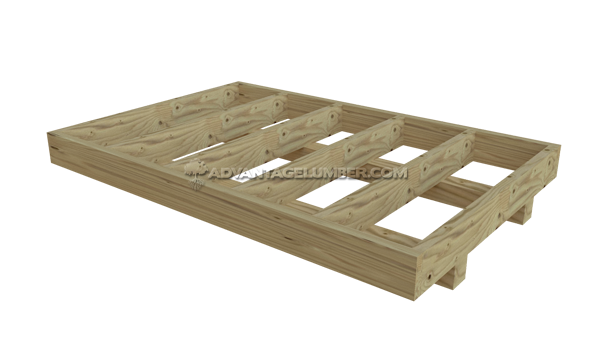
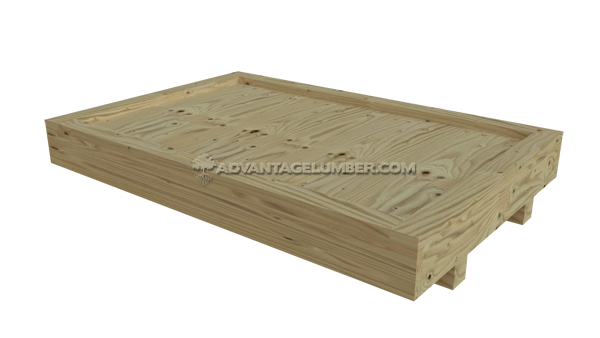
Prepare the site with a 4" layer of compacted gravel. Cut the two 4x4 skids at 70 ¾". Set and level the skids following FLOOR FRAMING PLAN. Cut two 2x6 rim joists at 70 ¾" and six joists at 44 3/8". Assemble the floor and set it on the skids as shown in the FLOOR FRAMING PLAN. Check for square, and then anchor the frame to the skids with four joist clip angles. Sheath the floor frame with ¾" plywood.
Step 2
Cut plates and studs for the walls: Side walls- two bottom plates at 47 3/8", four studs at 89", and four studs at 69"; Front wall- one bottom plate at 63 ¾", one top plate at 70 ¾", and four jacks studs at 63 ½". Rear wall- one bottom plate at 63 ¾", two top plates at 70 ¾", and six studs at 89". Mark the stud layouts onto the plates.
Step 3

Fasten the four end studs of each side wall to the bottom plate, Install these assemblies. Construct the built-up 2x6 door header at 63 ¾". Frame and install the front and rear walls, leaving the top plates off at this time. Nail together the corner studs, making sure they are level. Install the rear top plates flush to the outsides of the side wall studs. Install the front top plate in the same way.
Step 4

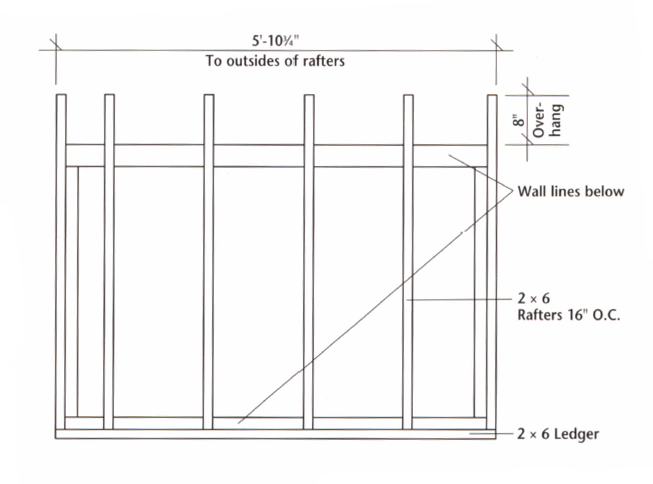
Cut the six 2x6 rafters following the RAFTER TEMPLATE. Cut the 2x6 ledger at 70 ¾"and bevel the top edge at 26.5 degrees so the overall width is 4 5/16". Mark the rafter layout onto the wall plates and ledger, as shown in the ROOF FRAMING PLAN, then install the ledger flush with the back side of the rear wall. Install the rafters.
Step 5
Complete the side wall framing: cut a top plate for each side to fit between the front and rear walls, mitering the ends at 26.5 degrees. Install the plates flush with the outsides of the end rafters. Mark the stud layouts onto the side wall bottom plates, and then use a plumb bob to transfer the marks to the top plate. Cut the two studs in each wall to fit, mitering the top ends at 26.5 degrees. Install the studs.
Step 6
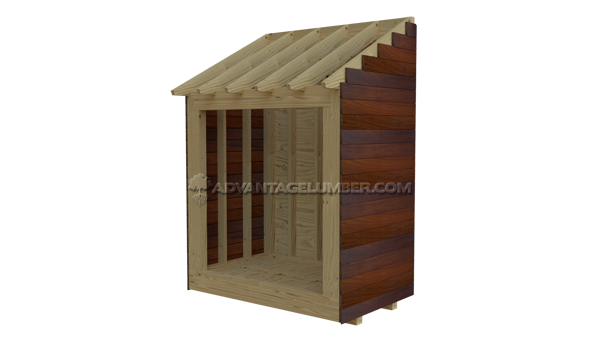
Sheath the side walls with Ipe Siding (Rainscreen or Shiplap profiles work great) and the rear wall with plywood siding, keeping the bottom edges ½" below the floor frame and the top edges flush with the tops of the rafters. Overlap the siding at the rear corners, and stop it flush with the face of the front wall.
Step 7
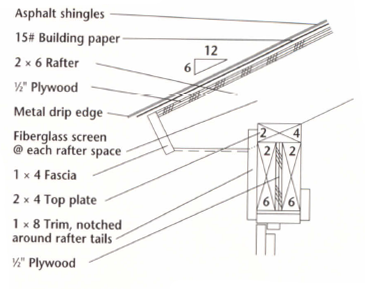
Add the 1x4 fascia over the bottom rafter ends as shown in the OVERHANG DETAIL. Install 1x8 fascia over the top rafter ends. Overhang the front and rear fascia to cover the ends of the side fascia, or plan to miter all fascia joints. Cut the 1x8 side fascia to length and the clip the bottom front corners to meet the front fascia. Install the side fascia.
Step 8
Install the ½" roof sheathing, starting with a full-width sheet at the bottom edge of the roof. Fasten metal drip edge along the front edge of the roof. Cover the roof with building paper, and then add the drip edge along the sides and top of the roof. Shingle the roof, and finish the top edge with cut shingles or a solid starter strip.
Step 9
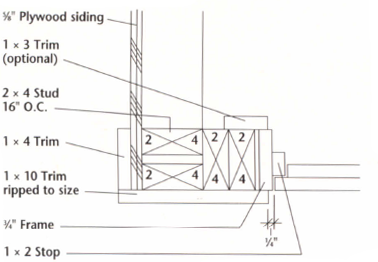
Cut and remove the bottom plate inside the door opening. Cut the 1x4 head jamb for the doorframe at 57 1/8" and cut the side jambs at 64". Fasten the head jamb over the side with 2 ½" from the edges of jambs, as shown in the DOORJAMB DETAIL. Install the frame in the door opening, using shims and 10d casing nails.
Step 10
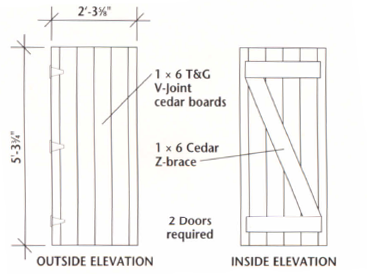
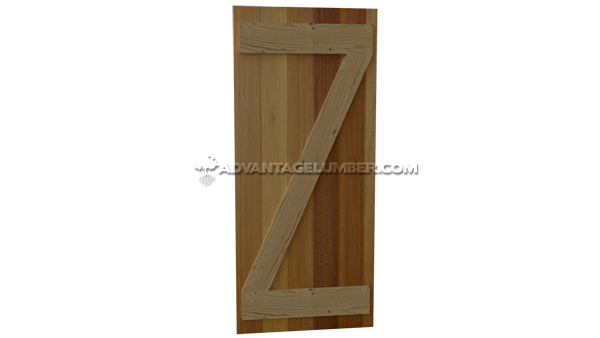
For each door, cut six 1x6 tongue and groove boards at 63 ¾". Fit them together, then mark and trim the two end boards so the total width is 27 5/8". Cut the 1 x 6 Z-brace boards following the DOOR ELEVATION. The ends of the horizontal braces should be 1" from the door edges. Attach the braces with construction adhesive and 1 ¼" screws. Install each door with three hinges.
Step 11
Staple fiberglass insect mesh along the underside of the roof from each side 2 x 6 rafter. Cut and install the 1x8 trim above the door, overlapping the side doorjambs about ¼" on each side. See OVERHANG DETAIL.
Step 12
Rip vertical and horizontal trim boards to width, and then notch them to fit around the rafters, as shown in the DOORJAMB DETAIL. Notch the top ends of the 1x10s to fit between the rafters and install them. Add 1x8 trim horizontally between the 1x10s below the door. Install the 1x4 corner trim, overlapping the pieces at the rear corners.
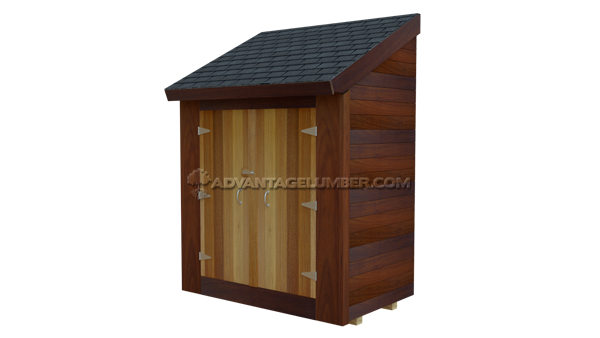
Your finished tool shed will be a stunning addition to your home that will also keep your tools safe and dry. Your next move is to put that shed to work! Check out our how-to page for more awesome DIY guides!