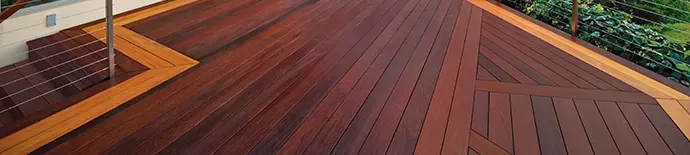
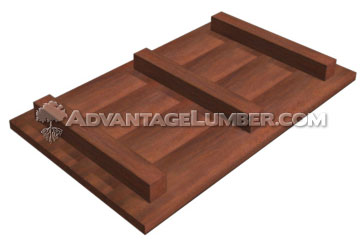
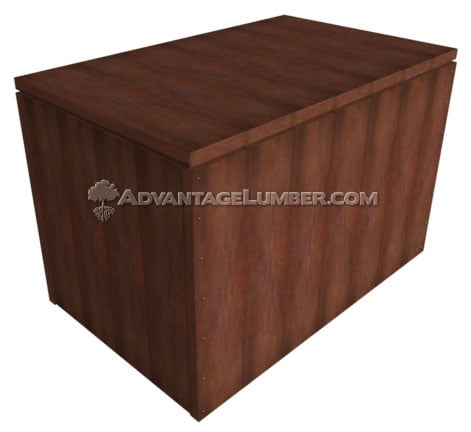
Deck Storage Box - Easy Weekend Project
Keep organized and add extra storage to your home with this attractive piece of furniture.
When the lid is down you have a handy bench seat and the tools will be kept dry.
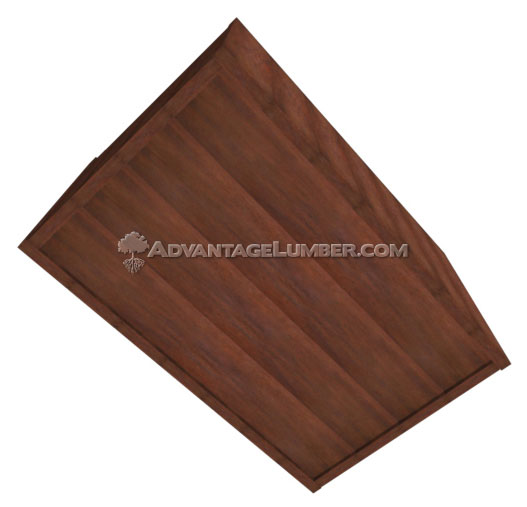
This Deck Storage Box is ideal for the inside of the home to store linen, sweaters, and blankets. It could also be use as a durable toy box! This storage box is made with Ipe so it can be use for the outdoors too. It's large enough to take your garden hand tools from rakes to gloves, pots and shears.
Ideal for the pool for storing umbrellas, pool toys and chemicals in sealed containers without to having to find room in other places. And if you have a need for storage on the deck, it can be used as an outdoor "mud–room" holding rubber boots, work boots, gloves and hat.
In the dockside you can use it to storage life jackets, skis and tow ropes are just some of the water-related stuff that finds a welcome home here. To top it all off, this project is also a comfortable bench, perfect for pausing beside the pool or lake.
Download Printable PDF Instructions
Required Tools List
- Carpenter's square
- Power saw or hand saw
- Power drill and bits
- Power sander
- Sandpaper
- Hammer
- Measuring tape
- Screwdriver
Material List
| Storage Box Part | Piece Count | Item | Length |
| SIDE PANEL | 14 | 1x6 T&G | 22" |
| 4 | 2x2 | 31 ½" | |
| END PANEL | 8 | 1x6 T&G | 22" |
| 4 | 2x2 | 15 ½ | |
| BOTTOM PANEL | 4 | 1x6 T&G | 33" |
| 3 | 2x2 | 16 ¼" | |
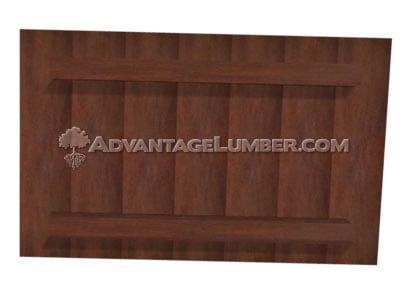
| LID | 7 | 1x6 T&G | 21" |
| 2 | 2x2 | 30" | |
| STORAGE REST ON/LEGS | 2 | 2x2 | 19 ½" |
YOUR Advantage Lumber, LLC ORDER TOTAL:
| 72 FEET OF 1X6 T&G |
Ipe:  Cumaru:
Tigerwood:
Cumaru:
Tigerwood:
|
||
| 42 FEET OF 2X2 |
Ipe:
Cumaru:
|
||
| 180 STAINLESS STEEL SCREWS #8x2 |
|
||
| 4 OUNCES GORILLA GLUE |
|
||
| IPE OIL™ |
|
-
Required Hardware (must be purchased elsewhere)
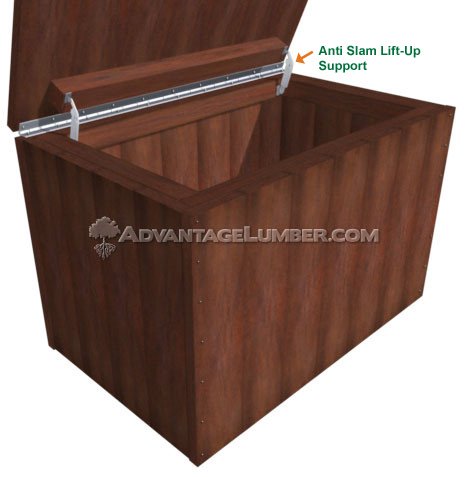
- Stainless steel piano hinge
- Anti slam lift-up lid support
Step 1: Making the Side Panels
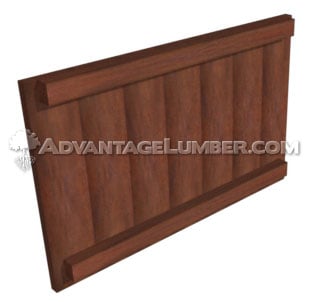
1) Start by forming the two long side panels. These panels will become the front and back of your new storage box. For each side cut 7 Tongue & Groove deck boards 22 inches long, and 2 cleats 31-1/2 inches long.
2) FIRST use a table saw to remove the tongue and groove portion of two deck boards. These boards are for the start and ends of the long sides. Now check your carpenter's square and make sure the edges are square down the length of each board, and that all the boards are the same length.
3) FIND a flat clean surface to work on. Then select which side of the boards you want to be the visible external surface. Lay out the two 31-1/2 inches cleats, 20-1/2 inches from outer edge to outer edge. As you work, remember all boards should be glued and fastened to the cleats with stainless screws.
4) PLACE one of the boards on the cleats and position it so the top is flush to the top cleat and the bottom cleat is 1-1/2 inches up from the bottom of the board. The board needs to hang over the end of both cleats by 1-1/2 inches, and down below the bottom cleat by 1-1/2 inches.
5) TAKE your carpenter's square and check that the cleats and the boards are square to each other and the cleats are parallel. Glue and fasten the side panel boards to the cleats with two #8x2 inches stainless screw top and bottom. To avoid visible screw heads, all screws except the starting screw on the first board and the finishing screw in the last board can be secretly fastened by screwing at an angle through the tongue.
(NOTE: To guard against splitting, pre-drill all screw holes with a 1/8' drill bit.)
6) NEXT, glue, fit, and fasten each board ensuring that the interlocking tongue and groove fit neatly with no gaps between the boards. Keep the top of each board flush to the top cleat and maintain the 1 ½ inch overhang on the bottom cleat.
7) The last board to be fitted will be the board without the tongue and this board should be also hang over the end of the cleat by 1 ½ inches.
8)When you've completed one long side, repeat the procedure for the other side.
Step 2: Making the End Panels
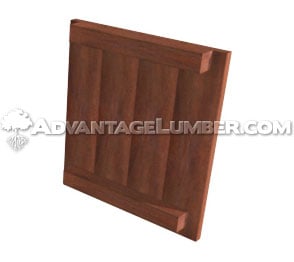
1) The left and right side panels are formed in much the same way as the long sides were. TAKE two 15- 3/4 inches cleats and place them 19-3/4 inches apart measured from outer edge to outer edge. Use four T&G boards 22 inches long, the first board without the tongue removed, are fitted tightly together onto the cleats with glue and stainless steel screws. Again ensure the boards and cleats are square to each other and that the top cleat is flush to the top of the boards and the bottom cleat is 1- 1/2inches up from the bottom.
2) The cleats for the end are positioned 2 ¼ inches in from the end edge of the first and last end panel board.
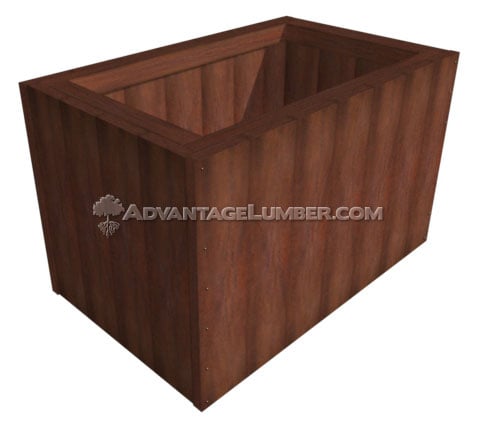
Step 3: Form the Box
The left and right side panels are formed in much the same way as the long sides were.
1)TAKE two 15- 3/4 inches cleats and place them 19-3/4 inches apart measured from outer edge to outer edge. Use four T&G boards 22 inches long, the first board without the tongue removed, are fitted tightly together onto the cleats with glue and stainless steel screws. Again ensure the boards and cleats are square to each other and that the top cleat is flush to the top of the boards and the bottom cleat is 1- 1/2inches up from the bottom.
2) The cleats for the end are positioned 2 ¼ inches in from the end edge of the first and last end panel board.
Step 4: Add the Bottom
1) Cut four boards 33 inches long. Plane off the tongue of one of the outside boards and the groove off the other. Cut the three cleats 16-1/4 inches long. Fit the four bottom boards with the end in line and even to each other. Position the boards on the cleats with the two end cleats located 1-1/2 inches in from each end and the third clean located centrally between. Glue and screw the boards to the cleat with 1-1/4 inch stainless steel screws.
2) Turn the chest upside down and place the bottom panel onto the bottom cleats. The surface of the bottom boards should be flush to the bottom of the outer side boards. Glue and screw the bottom panel to the cleats with 2 inch stainless steel screws.
Step 5: Now Top It Off
The storage box is now formed by fixing the ends between the two sides with glue and screws.
Before you do this, please check that all boards and cleats for the sides and ends are tightly fixed together. Also test that all edges fit evenly and neatly together.
1) STAND one long side the correct way up on your work surface, and place an assembled end into the 1 ½ inches space between the end of the side and top and bottom cleats. The top and bottom cleats of the end and side panels should line up on the inside with the outer face flush at the corner. Repeat the same checking procedure on all corner joins.
2) When you are satisfied with the fit, glue and screw each side to the end. Screw through the side panel board into the end panel board with 2 inches stainless steel screw-two per corner should be enough, to prevent splitting it's the best if you drill pilot holes for each screw. With a damp rag, wipe away any excess glue before it dries.
Step 6: Fit Your Hinges
A piano hinge is best suited to this type of lid as it runs the full length which adds stability to both the lid and box side. The hinge is cut ½ inch less than the length of the box. This hinge sits directly on the surface and does not need recessing down.
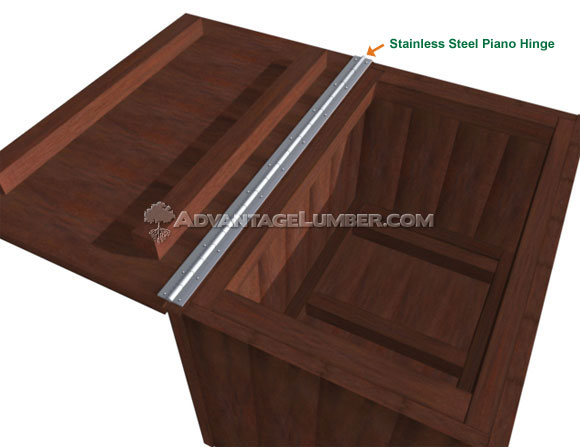
1) FIT the hinge to the lid and check that the screws do not go though the surface of the lid. Locate the lid in position on the box, aligning it up with the four surfaces of the box. Carefully mark the location of the two extreme end hinge screw holes. Then screw the land and hinge to the box and, with the lid held in the open position, proceed with the rest of the screw fixings.
2) The lid needs to have an anti slam lift-up lid support attached so it does not over open and tear itself from the hinge, or more importantly, slam shut on someone's fingers.
Step 7: The Final Touch
The final step is to apply a protective finish such as Ipe Oil™. Now, all that's left is to enjoy a glass of tea while you stand back and admire your handy work.
Congratulations!
Download Printable PDF Instructions